Красивый курсор мыши, как его установить на компьютере
Содержание:
Красивый курсор мыши, зачем он нам нужен
Здравствуйте друзья! Во время работы за компьютером, приходиться менять курсор компьютерной мыши. Для чего это нужно? Ведь у неё уже есть стандартный курсор от Windows.
Эта необходимость возникает из-за желания пользователей установить красивый курсор мыши, чтобы изменилась его форма и цвет. Например, есть обычный курсор в Windows, который кажется маленьким и еле заметным.
Вам может понадобиться увеличение курсора, чтобы быстро напечатать текст в Worde без лишних пробелов. Большой курсор пригодится и для записи видео-уроков, это поможет зрителю видеть выполняемые действия.
Далее, рассмотрим работающие способы установки курсора мыши.
Cursor Editor Help
Table of contents
- Drawing a cursor — about pencil, eraser, line, etc.
- Blending mode — mixing drawn and previous pixels.
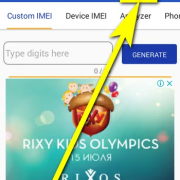
- Setting cursor hot spot — the «clicking-point» of a cursor.
- Selecting a color — pick color to draw with.
- Downloading a cursor — get the result of your work.
- Using templates — start making a new cursor.
- Applying effects — about colorize and drop shadow.
- Using cursor on your computer — changing mouse pointers.
Drawing tools
| Activate pencil by clicking on it. Then press and hold the mouse button on the canvas, move the mouse and release the button. | |
| Eraser works similarly as pencil, but instead of drawing, it erases the pixels. | |
| Lines, rectangles and ellipses are drawn by pressing mouse button in one corner of the shape and releasing it in the opposite corner. | |
| Press mouse button to change color of all adjacent pixels to the active color. |
Hot spot
Each mouse cursor has one special pixel (called hot spot) that controls the actual position of a click. For arrows, it is usually the upper left corner, for a sniper scope-like cursor, it may be in the center.
| Select the «Hot spot» tool and then click on a pixel. The clicked pixel becomes hot spot. Look at the preview in the lower left corner — the hot spot pixel is always in the center of the cross. |
Blending mode
If the opacity of the currently selected color is less than 100%, the blending mode controls whether pixels are replaced or drawn over the previous content.
| In «blend» mode, the pixels are painted over the previous content. | |
| «Replace» mode removes previous color and opacity of a pixel and uses the currently selected one. |
Downloading
Before you can use a cursor on your computer, you need to download it.
| Fill in a name for your cursor and then click the «Download» button in the lower area of the window. |
Important: When your browser asks you what to do with the file, do NOT try to open it. Instead, SAVE it to a folder of your choice. Only then you can make it your cursor.
Selecting color
Many of the drawing tools and effects are making use of the current color and opacity. You can select color and opacity by clicking in the color areas by the right side of the window.
Select hue by clicking in the top bar, select saturation and brightness in the middle square. Opacity (alpha) can be selected using the lower bar.
| The «Dropper» tool can be used to make color of a pixel on a canvas active. Click the tool and then the pixel. Previously active tool is re-activated automatically. |
Using templates
You can quickly delete all pixels or initialize the canvas with one of the common arrows.
Click on an image (or the empty space) in the «Templates» panel. It may take a second or more depending on your computer and internet browser (Internet Explorer is extremely slow).
Applying effects
There is a couple of effects that can be applied by clicking on them in the top toolbar. It may take a second or more depending on your computer and internet browser (Internet Explorer is extremely slow).
| Re-color all pixel using currently selected hue and saturation. | |
| Add a dark shadow around the drawn pixels. Repeat for more intense shadow. |
Основные сайты, предоставляющие курсоры
winscreen.ru — ресурс, предоставляющий многочисленные материалы для полной индивидуальной персонализации своего устройства. На сайте представлены иконки, обои, темы оформления, скины и указатели. Положительным моментом является быстрое скачивание и богатый выбор предоставляемых материалов. Ссылка для доступа к курсорам: http://www.winscreen.ru/cursors
winallos.com — еще один сайт, содержащий разнообразные ресурсы для украшения персонального компьютера. В его ассортименте обои, темы, шрифты, программы и много другое, что позволит превратить свою машину в уникальный аппарат. Скачивание проходит напрямую, нужно лишь нажать на кнопку. Ссылка на каталог курсоров: http://winallos.com/kursory
7 themes. su — также дает возможность изменить внешний вид ноутбука или ПК. На нем представлена большая коллекция различных инструментов для полного изменения внешней оболочки операционной системы, в том числе и курсоры для виндовс 10. Для загрузки с сайта необходима регистрация, что делает его менее привлекательным по сравнению с остальными сайтами схожего профиля. Ссылка: https://7themes.su/stuff/kursory_windows/7
https://youtube.com/watch?v=x91rtw8TqbY
https://youtube.com/watch?v=58-UJSg5EPc
Originally posted 2018-04-17 09:46:31.
Как установить курсор мыши
Итак, как установить курсор мыши? Здесь нет ничего сложного. Главное выбрать подходящий способ и действовать по инструкции:
- Автоматическая установка курсора для компьютерной мыши. Этот вариант установки курсоров подходит всем операционным системам. Нужно лишь скачать в Интернете набор курсоров и установить их через специальный файл установщика.
- Ручная установка курсора. Такой способ отнимет у Вас немного времени. Таким образом курсор установится через настройки компьютерной мыши.
- Самостоятельное создание курсора. В этом случае Вы сможете сами нарисовать курсор на сервисе и его сохранить на компьютер. Об этом будет рассказываться ниже в статье.
Способы установки курсора мы разобрали. Теперь, перейдём к инструкции, в которой будут показаны все процессы установки курсоров в Windows 10 и 7.
Красивый курсор мыши для Windows 10
Прежде чем мы установим красивый курсор мыши, найдём его в Интернете и скачаем на компьютер. Для этого заходим в любой браузер и в его поиске пишем «Скачать курсоры для компьютерной мыши» (Скрин 1).
Далее, открываете первый попавшиеся сайт с курсорами. Выбираем желаемый вариант и нажимаем «Подробнее» (Скрин 2).
Затем, нужно кликнуть кнопку «Скачать с сервера» (Скрин 3).
Для того, чтобы загрузить курсоры на компьютер.
Этот файл скачивается быстро и после этого будет отображаться в загрузках на компьютере. Далее, необходимо распаковать этот архив с файлами. Например, перенести папку из архива с курсорами для мыши, на рабочий стол компьютера.
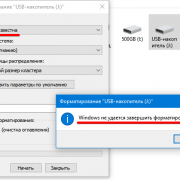
Мы скачали папку с курсорами, которая называется «LeafSimple». Переходим в неё и находим там установочный файл с названием – «Install.inf» (Скрин 4).
Нажимаете по нему правой кнопкой мыши и выбираете из разделов меню пункт «Установить». Впоследствии у Вас будет открыто окно (Свойство мыши) в котором нужно нажать кнопку «ОК», чтобы действие подтвердилось и курсор мыши установился.
Это простой способ установки курсора. Есть еще варианты, которые будут рассматриваться дальше.
Устанавливаем указатели мыши для Windows 7
В Windows 7 имеются все инструменты, чтобы установить курсор для мыши. Рассмотрим ручной способ установки курсора. В первую очередь, найдите в Интернете нужные Вам курсоры и скачайте их на компьютер.
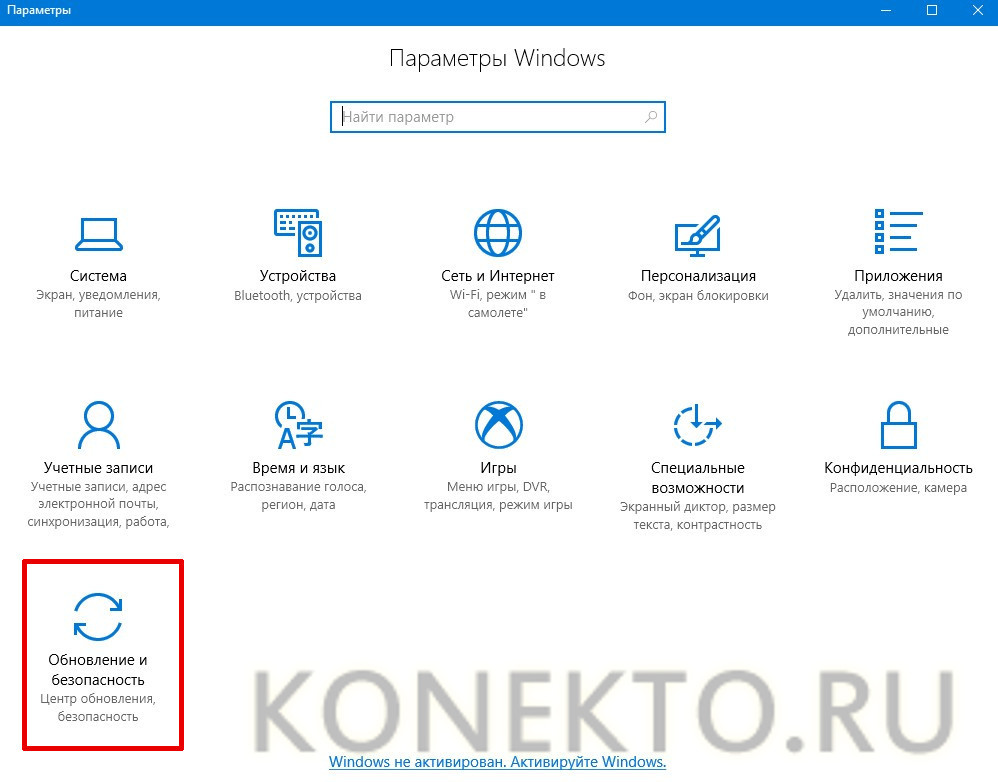
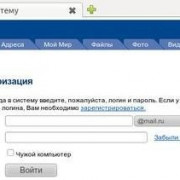
Далее, наводим компьютерную мышку на рабочий стол компьютера и нажимаем правой кнопкой мыши, чтобы выбрать из меню «Персонализация» (Скрин 5).
В появившемся окне выбираете раздел «Изменение указателей мыши» и «Указатели» (Скрин 6).
Далее, устанавливаем схему курсора, его вид и нажимаем «Применить» либо «OK», чтобы он установился (Скрин 7).
Для быстрого поиска «Свойства мыши» можно воспользоваться кнопкой поиска на компьютере. Открываем меню «Пуск» и пишем в поиске «Мышь». Далее, заходим в её настройки.
Также Вы можете использовать кнопку «Обзор», чтобы загрузить с компьютера ранее скачанные курсоры с Интернета. Нажимаете по ней в свойстве мыши и выбираете папку с указателями на компьютере (Скрин 8).
Далее, нужно кликнуть по указателю и кнопку «Открыть». Затем, выбираете из списка загруженный курсор и нажимаете «Применить», чтобы он смог установиться.
Latest cursor sets
20 most recent cursor sets that follow the quality guidelines.
Magnifying glass Cursors
by Bobcat4Are you sure of some secret lurking in your computer? Find out with y…
Black Among Us W/ Rover Pet & Ski Goggles Cursors
by tHEmEEPYjIB164Hello Everyone! My new set is here! It’s a black, pixelart style amon…
Hand Drawn Rainbow Pointers (non-animated) Cursors
by Couriem50Well, some people wanted me to do something that ISN’T Among Us relat…
Materialism Cursors
by R0mKa2177Hello! Here’s the site i downloaded this cursor set on, because i don…
Muzan Kibutsuji Cursors
by LisSweetie34Demon Slayer — Kimetsu no Yaiba
Kanao Tsuyuri Cursors
by LisSweetie83Demon Slayer — Kimetsu no Yaiba
Snacking Panda Cursors
by dingdongdie191shhh, he’s hungry, alright? have any cursor requests? feel free to co…
Rainbow Cursors
by Bobcat705I decided to do something more minimalist this time, so here you are!…
DiamOS pack Cursors
by DeathkidVR578This awesome DiamOS Pack will make your computer pop! Go check out th…
Ryan\’s Glove Cursors
by itryan10229244welp. here it is, my first set of cursors. how it happened? well, i p…
Among Us White With UFO Cursors
by tHEmEEPYjIB719A white pixel art style among us cursor set, with a UFO companion.
Giyuu Tomioka Cursors
by LisSweetie245Demon Slayer — Kimetsu no Yaiba
Smooth blue static lazor! Cursors
by Neo381These are some nice smooth relaxing static solid blue set of cursors!…
Among Us Mixed Pointer Pack (w/ bonuses) Cursors
by Couriem1241Here we are again, yet another among us cursor set. Includes four bon…
Cool Cat Cursors
by Bobcat241Do you like cats? and sunglasses? This are the cursors for you! Learn…
Shinobu Kocho Cursors
by LisSweetie164Demon Slayer — Kimetsu no Yaiba
Tanjiro Kamado Cursors
by LisSweetie315Demon Slayer — Kimetsu no Yaiba
Power-ups Cursors
by Bobcat223My first cursor set!!! They are drawn and my cursors. I am obsessed w…
3D Gold Cursors
by sniped644873-D gold cursors from Windows 98/XP
Teeny Tiny Windows Default Cursors
by Player 998A cursor set made from the windows default cursors except all the cur…
- Oldest
- Latest
Click on a number above to display page with 40 cursor sets. The cursor sets are sorted by date.
Cursor junkyard
Not everybody uploads enough cursors to create a cursor sets. Such submittions end up on the cursor junkyard. Despite the name, there are some worthy pieces. Check them out.
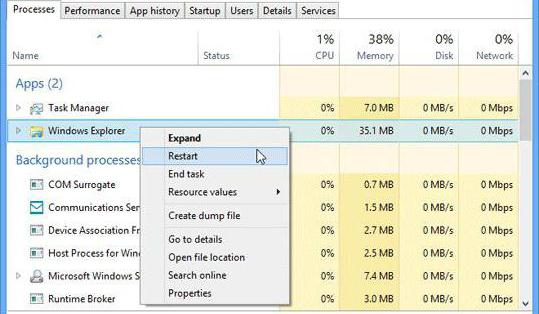
How to change the mouse pointer?
If you change your cursors frequently, consider using a free tool that allows you to
change cursor from Windows Explorer context menu. Beside changing cursors one by one, the tool also allows exporting and importing cursor schemes.
If you do not want to install any software, just click on Control Panel in Start menu, then double-click the Mouse icon and
switch to Pointer tab. Here you can change the cursors used by Windows in different
situations to the downloaded ones.
Adding your cursors to the library
If you are an author of a cursor or cursor set, you may present your work to visitors
of this web site. To add your cursors to the library:
- Get RealWorld Cursor Editor (it’s free).
- Open a cursor file, and click the command «Cursor»->»Add to Online Library» from application menu.
- When uploading, please use the same email address associated with your account on this server.
- Carefully choose file name and fill in the description. This helps people to find your cursor when using the search box.
- The cursors are by default added to the «Junkyard». If you have already added
multiple cursors with similar theme and you would like to have them turned into a cursor set, register or login and return to this page.
Important: only cursor authors or copyright holders may add cursor to the library.
If you are using pictures downloaded from internet to create cursors, you must make sure the author of the pictures
allows this use of their work.
If you have found that someone has used your pictures and added them to the library without your permission, contact us immediately at info@rw-designer.com and they will be removed.
Important: always create 32×32 pixels cursors unless you have a serious reason not to. While it is possible to make cursors of non-standard size, Windows will automatically resample them decreasing image quality.